
Seja uma lenda
dos contratos
Seja mais eficaz com os contratos verdadeiramente digitais Oneflow que tornam o trabalho mais rápido e a vida mais fácil.
Não é necessário cartão de crédito
4.5 Avaliação
Não é necessário cartão de crédito
|
4.5 Avaliação


Crie, assine e cresça. Tudo em Oneflow.
Substitua todas as ferramentas de que necessita apenas para assinar um contrato. Não precisa de vários ficheiros, longas linhas de correio electrónico, nem de mudar de contexto. Automatize todo o processo do contrato – desde a criação até à assinatura e gestão.
Crie
Crie rapidamente contratos digitais impressionantes e com capacidade de resposta. Num abrir e fechar de olhos.
Crie contratos a partir de modelos
Adicione um vídeo, um formulário, uma tabela, etc.
Aumentar o tempo de assinatura

Colaborar
Trabalhe em conjunto numa versão em tempo real. Sem truques.
Edite em direto, mesmo depois de ter sido enviado
Torne os campos interactivos
Acompanhe todas as interacções

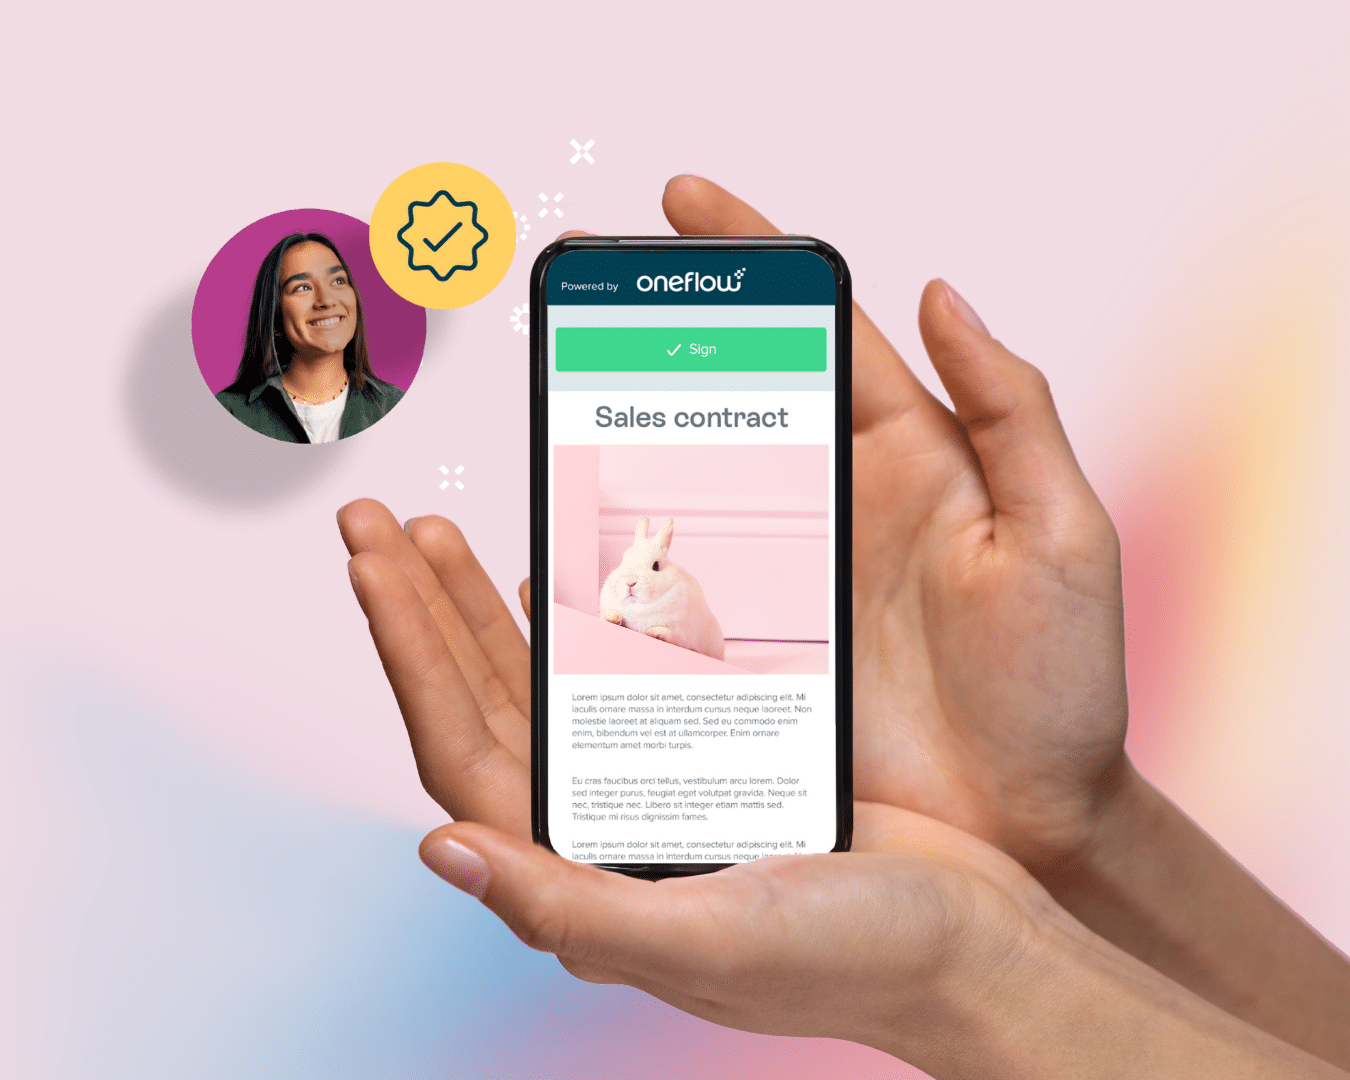
Assine
Obtenha uma assinatura electrónica segura e juridicamente vinculativa em qualquer dispositivo, em qualquer lugar. Acordada mesmo à frente dos seus olhos.
Utilize a assinatura electrónica
Fixe com um selo
Ver e assinar electronicamente no telemóvel

Gerir
Proteja e acompanhe os ciclos de vida dos contratos, tudo num só lugar. E pronto!
Mantenha-se sempre em conformidade
Controle o acesso dos utilizadores
Receba lembretes automáticos

Analise
Torne-se mais inteligente instantaneamente com informações em tempo real a cada passo. Sem ilusões ou conjecturas.
Veja as informações em tempo real
Melhore o desempenho
Tome melhores decisões

Integrar
Ligue os contratos aos sistemas empresariais e facilite a vida com automatização. Eficiência, diretamente do nada.
Simplifique os fluxos de trabalho
Mantenha-se sincronizado em todas as ferramentas
Integrações nativas

Diga contrato, pense Oneflow!
Utilize uma ferramenta para cobrir todas as suas necessidades contratuais. Crie contratos digitais dinâmicos, colabore nos seus contratos em tempo real, assine de forma segura com assinaturas juridicamente vinculativas e acompanhe todos os contratos na sua fonte única de verdade organizada.
Pré-assinatura
- Biblioteca de modelos
- Espaços de trabalho
- Permissões de utilizador personalizadas
- Integrações
- API criável
- Marca personalizada
- WaaS
Assinar
- Opções de assinatura eID
- Formulários interactivos
- Ordem de assinatura
- Edição em direto
- Notificações, controlo
- Assinatura manuscrita
Pós-assinatura
- Arquivo universal
- Pastas, etiquetas
- Filtros
- Transferências de dados
- Lembretes internos
- Ligação de contratos


Acredite nos seus olhos
Deixe-nos mostrar-lhe como criar, assinar e gerir contratos na Oneflow. Tudo numa única plataforma.

Oneflow pode ajudá-lo a poupar tempo e dinheiro?
Utilize a nossa calculadora e responda a cinco perguntas para calcular quanto é que os processos de contratação manuais estão a custar à sua empresa.


“Existem muitas ferramentas de assinatura electrónica integradas com Upsales. Mas outras ferramentas não têm Áreas de Trabalho separadas, para criar e gerir diferentes tipos de contratos — vendas, gestão, RH — e podem controlar permissões entre as diferentes áreas de negócio. Isso foi importante para nós.”
Leia a história completa

Integrações perfeitas
Integre as suas ferramentas favoritas com fluxos de trabalho de assinatura electrónica e gestão de contratos.